
Murky water is one of the most common reasons an underwater camera image looks soft, gray, or unclear. It affects anglers trying to locate fish, aquaculture teams checking ponds or cages, and inspection users who need a practical view of tanks, wells, reservoirs, or underwater structures. The problem is usually not the camera alone. Visibility depends on light, distance, water particles, camera angle, movement, and the way the system is configured for the job.
If you want to improve underwater camera visibility in murky water, start by reducing the distance between the camera and the subject, controlling backscatter, using the right light angle, and moving the camera slowly. For product buyers, it also helps to choose a camera system with adjustable lighting, stable cable transmission, a clear monitor, and a practical waterproof camera housing.
This guide explains the practical steps that improve visibility and how those steps apply to underwater fishing cameras, aquaculture monitoring, pond observation, and portable underwater inspection cameras.
Quick Fixes for Murky Water Visibility
Before changing the camera, check the operating method first. In many cases, a small change in distance, lighting angle, or camera movement can improve the image more than a higher resolution sensor.
| Problem | What to do | Why it helps |
|---|---|---|
| Image looks gray or washed out | Move the camera closer to the target | Less water between the lens and target means less light scattering |
| Bright particles reflect into the lens | Angle the light away from the camera lens | Reduces backscatter from suspended particles |
| Bottom sediment clouds the view | Lower the camera slowly and avoid dragging it | Prevents the cable or camera head from disturbing silt |
| Fish or objects disappear in low light | Use adjustable IR, white LED, or dual light | Lets the operator match lighting to depth, water color, and target behavior |
| Video becomes shaky or hard to judge | Keep the camera stable and move in short steps | Gives the sensor and the operator time to read contrast |
What Actually Ruins Visibility in Murky Water?
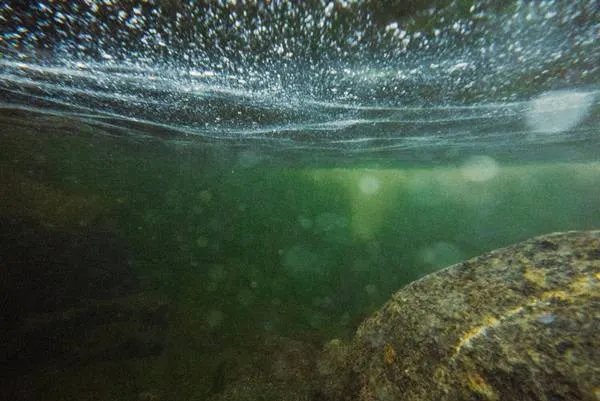
Murky water does not simply mean dirty water. It means the water contains particles, algae, sediment, or organic matter that interrupt the light path between the object and the camera lens. Both human eyes and camera sensors need light to travel clearly from the subject to the viewer. When that path is broken, the image loses detail and contrast.
Light Absorption and Color Loss
Water absorbs light as depth increases. Red and warm colors disappear first, while blue, green, and gray tones become stronger. In murky ponds, reservoirs, and fish farms, this color loss happens even faster because particles absorb and scatter light before it reaches the camera. This is why a camera may show a usable image in clear water but a flat, low-contrast image in the same depth of turbid water.
Suspended Particles
Suspended particles are usually the main reason for poor underwater visibility. They may come from mud, plankton, algae, feed residue, decaying plants, or disturbed bottom sediment. The more particles between the camera and the target, the less detail the camera can capture. This is why distance control is so important in murky water.
Backscatter
Backscatter happens when light hits particles in front of the camera and reflects back into the lens. It often looks like fog, snow, or bright floating dots. Using stronger light does not always solve this problem. If the light is too close to the lens or points directly forward, it can make the image worse. The solution is to soften the light, adjust the angle, or use a camera design where the light position is more practical for the application.
Disturbed Sediment
In ponds, lakes, tanks, and reservoirs, the bottom may contain fine sediment. A camera head, cable, or operator movement can lift this sediment into the water. Once that happens, visibility may remain poor for several minutes. For inspection work, it is usually better to approach the target slowly from above or from the side instead of touching the bottom first.
Algae and Biological Growth
Algae can make the water look green, brown, or cloudy. It reduces contrast and absorbs light unevenly. In aquaculture and pond monitoring, algae is often part of the working environment, so the goal is not always perfect clarity. The goal is to get enough useful visual information to identify fish activity, structure, obstacles, bottom condition, or equipment status.
How to Improve Underwater Camera Visibility in Murky Water
1. Control Backscatter First
Backscatter is often the biggest enemy in murky water. Keep the light from pointing straight into the same particles that sit directly in front of the lens. If the camera has adjustable brightness, start lower and increase gradually. If the system uses external or adjustable lights, angle them slightly away from the lens instead of straight ahead.
For fishing applications, infrared light can reduce visible disturbance in some conditions. White LED light can show more natural detail when the water is only slightly cloudy. Dual-light systems give brands and distributors more flexibility because users can switch between IR and white light depending on the water. For a deeper lighting comparison, see our guide on infrared vs white light in underwater fishing cameras.
2. Get Closer Than Feels Natural
In clear water, users often expect the camera to see far. In murky water, distance is the first limit. Even a good camera cannot recover detail that has already been scattered by several meters of cloudy water. Moving the lens closer to the fish, object, pipe wall, tank bottom, or structure is usually the fastest way to improve image clarity.
For product selection, this means cable control and camera handling matter. A practical portable system should let the user place the camera steadily at the right depth and distance. Long cable options are useful for deep water, but clear operation also depends on stable signal transmission and manageable cable handling.
3. Use Wide, Soft, Adjustable Lighting
Narrow, strong beams can create bright reflections from particles. Wider and softer lighting can make the scene easier to read because it reduces harsh hot spots. Adjustable brightness is especially useful in mixed conditions, such as shallow ponds in daylight, ice fishing shelters, deeper reservoirs, or tanks with uneven lighting.
When comparing camera models, do not only ask whether the camera has LEDs. Ask whether the light is adjustable, whether IR and white light are available, and whether the light design fits the target market. Buyers planning an OEM or private label fishing camera line can use our underwater fishing camera buying guide to compare monitor size, cable length, lighting, DVR, battery, and configuration choices.
4. Move Slowly and Avoid Stirring the Bottom
Fast camera movement makes murky water look worse. It increases motion blur, stirs sediment, and makes it harder for the operator to judge contrast. Lower the camera slowly, pause often, and let the scene settle before making decisions. This is useful for fishing, but it is even more important for aquaculture checks and inspection tasks where the operator needs to observe a specific area.
5. Adjust the Camera Angle
A straight-on view is not always the best view. Sometimes a slight side angle or downward angle reduces reflection and improves contrast. When checking a pond bottom, tank wall, cage net, or underwater object, try to use the angle that gives the strongest silhouette rather than the brightest picture.
6. Use Contrast Instead of Chasing Fine Detail
In murky water, the goal is often to recognize shapes, movement, structure, and position rather than capture a perfect image. For fishing, that may mean identifying fish behavior near bait. For aquaculture, it may mean checking feeding activity or bottom condition. For inspection, it may mean locating a blockage, object, cable, wall, or damaged area. A usable contrast image is often more valuable than an over-sharpened image with artificial noise.
Best Camera Settings for Murky Conditions
Lower Sharpness
High sharpness can make suspended particles look more obvious. In murky water, a slightly softer image may be easier to read because it reduces artificial edges around particles and noise. If the monitor or DVR allows image adjustment, avoid pushing sharpness too high.
Reduce Gain or ISO When Possible
High gain or ISO can brighten the image, but it can also increase noise. In low-light murky water, test brightness and gain slowly. A darker image with better contrast may be easier to interpret than a bright image full of noise and backscatter.
Lock Focus or Use a Practical Fixed-Focus Design
Autofocus can struggle when particles move across the lens. Many practical underwater camera systems use fixed-focus or simple focus designs because the operator needs stable viewing more than cinematic focus changes. For OEM products, the right focus distance should match the real use case, such as close-range fish viewing, tank monitoring, or deep-water observation.
Use Recording as a Review Tool
When visibility is low, users may miss details in real time. DVR or photo recording helps them review the footage later, compare different angles, and document the inspection result. This is useful for fishing content, aquaculture records, and project-based inspection work.
Tips for Fishing, Aquaculture, and Inspection Applications
| Application | Visibility priority | Recommended approach |
|---|---|---|
| Ice fishing and lake fishing | Finding fish, bait, and bottom structure | Use stable placement, adjustable light, and short viewing distance |
| Aquaculture and pond monitoring | Checking fish activity, feed response, and bottom condition | Move slowly, avoid disturbing sediment, and use a practical monitor size for field viewing |
| Tank and cage observation | Reading structure, nets, walls, and movement | Use side angles and consistent light rather than maximum brightness |
| Portable underwater inspection | Identifying objects, damage, obstacles, or wall condition | Choose long-cable systems with stable video, adjustable LEDs, and recording options |

Product Features That Help in Murky Water
If you are selecting a camera for a product line, distribution channel, or project supply, the right features depend on the market. A fishing camera buyer may care most about portability, monitor size, battery life, and dual light. An aquaculture or inspection buyer may care more about cable length, waterproof reliability, recording, and stable operation in deeper water.
- Adjustable IR and white LED lighting: Helps users adapt to depth, water color, and target behavior.
- Clear portable monitor: A 7-inch or larger display can make low-contrast scenes easier to judge in the field.
- Stable cable transmission: Important for deep water, pond monitoring, and inspection tasks where signal stability matters.
- DVR or photo recording: Useful for reviewing low-visibility footage and documenting inspection results.
- Portable battery system: Helps users work outdoors without relying on external power.
- Waterproof camera housing: Supports repeated field use in fishing, aquaculture, and inspection environments.
For fishing brands and distributors, a model such as the 7-inch underwater fishing camera system CR110-7S-DL shows how a portable monitor, dual lighting, adjustable brightness, battery, and OEM configuration can support real field use. For inspection and aquaculture buyers, the CR110-7C portable deep water inspection camera is closer to a long-cable observation and monitoring configuration.
When to Choose a Portable Underwater Inspection Camera
A fishing camera can work well for short-range viewing and fish observation, but it is not always the right choice for project work. If the user needs longer cable options, deeper viewing, tank or pond checks, search tasks, or inspection documentation, a portable underwater inspection camera may be a better fit. These systems are built around practical viewing distance, cable length, waterproofing, and stable operation rather than only recreational fishing use.
BestWill supports portable underwater camera systems for fishing, aquaculture, observation, monitoring, and selected inspection tasks. For buyers planning a custom product line, our underwater camera product capabilities page explains the main product categories and OEM-focused support.
Conclusion
To improve underwater camera visibility in murky water, focus first on distance, lighting angle, camera movement, and backscatter control. More resolution alone will not solve the problem if the water between the camera and the target is full of suspended particles. A practical setup with adjustable lighting, stable cable handling, useful recording, and the right camera configuration will usually give better results.
For B2B buyers, the best underwater camera is not always the model with the most impressive single specification. It is the system that matches the real environment: fishing, aquaculture, pond monitoring, tank observation, or portable inspection. That is where careful product configuration and application-based OEM support become important.