


Whether you are fishing or doing a simple underwater inspection, murky water can be your biggest enemy. Even with modern equipment like underwater cameras or fishing-specific gadgets, murky water can severely impact the visibility and reduce the quality of video output. Murky water isn’t just dirty. It actively bends, scatters, and absorbs light, which affects the contrast before your eyes even process the scene. When using underwater cameras, murky water can be a real hassle for you, reducing the overall visibility and recording. Whether it is a human eye or a camera, murky water causes the same light scattering problem in both. Human eyes will find it hard to see in murky water. Similarly, underwater cameras will produce blurry or grainy footage in that water.
There is a misconception that more resolution equals better visibility, but the reality is the exact opposite. Distance, lighting, and angle of capturing matter way more than the camera quality. Especially in the murky water, these concepts become important for the camera operators to know. Whenever you try to record footage underwater, the results will depend on various factors, including the lighting medium and the physical environment.
Murky water is a gradual overload of particles and light distortion that crosses a threshold. The issue is not just what is inside the water but how those elements interfere with light. Both human and camera sensors rely on clear and direct light paths. Murky water conditions break the path in multiple ways. In this article, let’s discuss all the possible issues created by murky water and the ways to overcome or reduce its effects. This is important because it can heavily impact the camera light that you are going to use, i.e., white light or IR light.
Before you do anything
If you think the water has been disturbed by some external element or your own interference, it is best to give it some time and let it settle down. If these are only the sand particles or loose sediments suspended in water, they will slowly sink back to the bottom, improving visibility naturally.
In many cases, people unknowingly make the situation worse by walking, swimming, or using equipment after the disturbance. Natural water bodies also behave differently depending on the type of sediment. Fine clay and silt can remain suspended for longer than coarse sand. So, some water can take more while some will take less to get clear. So, rather than overthinking your camera settings or using some tricks, it is best to have some patience and give the water some time to settle and then get started.
What actually ruins visibility? (For Eyes and Cameras)
Several factors ruin the visibility underwater. But some common issues can result in visibility loss for both human eyes and cameras.
Light Absorption and Color Loss
Murky water not only reduces visibility but also causes several problems. Most people see blurred videos and low contrast, but the real damage happens at the level of light behavior and signal clarity. In bad water, underwater scenes don’t get darker, but they lose color in a specific order.
- First of all, red wavelengths disappear.
- Then come the orange and yellow wavelengths.
- Blue and Green travel the farthest, which is why everything shifts toward these tones.
When the light is absorbed by the murky water, the resulting footage is flat with gray-green visuals. There is a loss of color contrast, and you will find it difficult to distinguish objects.
Suspended Particles (The primary culprit)
Suspended particles in water mainly include silt, clay, organic debris, plankton, and algae. All these things make the light scatter in all directions and block the direct line of sight. They create a grainy and milky visual field for both cameras and human eyes. For camera footage, it will show up as noise and haze, and you may see reduced sharpness and depth of field in your camera DVR. Even perfectly still water can have poor visibility when the particle density is high enough in it.
Backscatter (When light is against you)
When doing fishing or some underwater observations, you want the light to reach the subject and then come back to the sensor. We want the reflection to bounce straight back into the lens or our eyes. However, when the lighting is lower than required, you see bright floating dots, which is also called the snow effect. The contrast will be washed out, and the details will be lower. When combined with murky water, the backscatter can sometimes totally ruin the recording or viewing experience.
Disturbed Sediment
A large portion of poor visibility or murky water conditions is created in real time. The common causes are walking or finning near the bottom, equipment dragging sediment, strong currents, or recent rainfall. This results in instant clouding in water and a drop in visibility from meters to centimeters. However, this is one of the few factors that you can directly control by reducing your movement or waiting for these sediments to settle.
Algae and Biological Growth
Unlike sediment, algae are living particles that actively multiply. Sunlight and nutrients make them grow faster and more bulkily. The biggest issue is that they remain suspended longer than heavier particles. The effect is green-tinted water and persistent haze that doesn’t settle quickly.
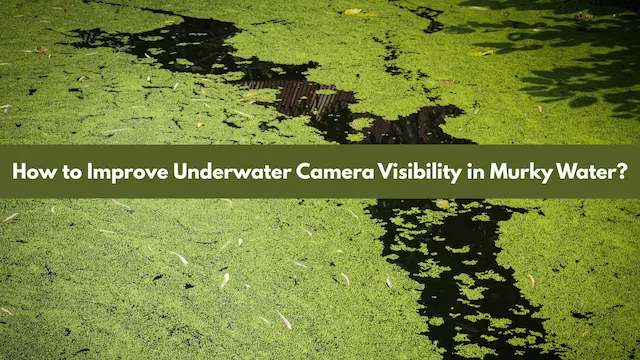
How to Improve Underwater Camera Visibility in Murky Water?
1.Cotrol Backscatter (Your Biggest Enemy)
Backscatter is when your light reflects off the particles in the water directly back into the lens. In the clear water, the light should be reflected from the actual object you are looking to shoot, but when there are small particles inside the water, the light will get reflected from halfway, and it will result in blurry footage.
How to Reduce it?
- Move lights away from the camera axis. Go for side lighting rather than straight-on
- Make sure to angle the lights slightly outward so that they don’t hit the particle’s head-on
- Avoid using the built-in camera light in murky water.
As discussed earlier, backscatter is the lighting problem rather than water only. Now, some people will say a larger light means less backscatter, but that is not the case. Even a cheap external light placed 20 to 30 cm off-axis can outperform a powerful centered light in this case.
2.Get Closer than what feels natural
Even if the water is totally clear, it reduces the visual quality as the distance increases. This can be worsened when the water is murky. The difference between 2 meters and 50 can have a massive difference in the visuals, also. So, if you already think you are close enough, go a little closer. Now, this will be applicable mainly in underwater observations rather than fishing; you can apply these fundamentals almost everywhere.
3.Use the right lighting
Lights of different wavelengths behave differently underwater. In murky water, the right lighting strategy matters more than the intensity of the lights. But if no light is working for you, especially when there is a lot of dirt in the water, you may have to switch to IR lighting.
It is good to choose warmer lights (4000 to 5000K) in murky or green water. Avoid overly cool or blue-heavy lighting because they scatter more in particulate-heavy environments. If the water is algae-heavy, a warmer tone can cut through the green cast more effectively.
4.Use Wide and Soft lighting instead of narrow beams
Narrow flashlight beams illuminate particles too densely in a small and concentrated path. This results in a lot of haze. In comparison to it, the wide diffused lighting works better because its lighting spreads more evenly, and the reflections become softer. The suspended particles become less noticeable. In most murky water environments, medium brightness with a wide beam outperforms maximum brightness. Also, softer lighting produces cleaner footage than harsh lighting. Using wide and soft light can enhance your visual experience and the recording in lake inspections, river cameras, and ice fishing cameras.
5.Whenever possible, work with natural light
Artificial lighting is good as long as natural light is not present. But, in shallow water during daytime, try switching off all your artificial lights and let the sun do its job. If the water is too murky, this may not work, but in moderately clear waters, sunlight can provide more natural contrast. Side sunlight sometimes creates better visibility than LEDs. However, artificial lighting may increase the reflection of particles. The best conditions to utilize the sun’s natural light are mid-morning to early afternoon and when the sun is behind the camera. This may not work after the rain or in the low-angle evening light.
6.Move Slowly
Murky water holds suspended sediment and other particles longer than you think. So, a fast movement will lift silt from the bottom pretty easily. It will create clouds around the camera and instantly run visibility. This can be a much more serious problem with wading anglers, ROV propellers, divers near muddy bottoms, and handheld inspection cameras. If you are underwater, it is very important to learn the skill of moving slowly and understanding the impacts of carelessness. Try to avoid sudden fin kicks and stay slightly above the bottom. If you have disturbed the water, let the sediment settle before filming or observing again.
7.Adjust Camera Angles
Straight-ahead filming is most often the worst approach in murky water conditions. The camera sees the maximum amount of suspended materials because of the way they work. The light reflects directly backward, and the contrast becomes flat. The better approach is to use a slightly downward angle and do side-angle inspection. Framing objects against darker objects is generally a good approach. Even small angle adjustments can improve clarity noticeably. Using a camera is generally a matter of practice, and with portable cameras, it can be a little hard to make changes from outside the water. However, if you are inside the water, you have more control over your movements and how you approach an object.
8.Use contrast instead of detail
Murky water is the biggest culprit in destroying fine details first. So, instead of trying to capture perfect textures, try to focus on silhouettes and movements. It will give you better results if you focus on shape separation instead of trying to have the footage with the best resolution. For fishing cameras, high-contrast bait works better. Black, white, or chartreuse stand out in a much better way. If your ultimate goal is inspection, edge detection will matter much more to you than the color accuracy. Experienced underwater operators try to identify patterns instead of relying on crystal clear imagery. Water is unpredictable. So, it is better to be a little technical and use all the important skills that are known to give results.
Best Camera Settings for Murky Conditions
There are some classic settings that you can use to get better footage and results in murky water conditions. Murky water can have its own situation, but you should try to do tweaks to your camera settings and see if you can improve even by 1%. Below are some settings that you can try.
1.Lower Sharpness
Many cameras apply digital sharpening automatically to make footage appear more detailed. But, underwater scenes already contain suspended sediment, tiny reflective particles, floating organic debris, and sensor noise from low light. So, when sharpness is increased, the camera starts treating these unwanted elements as important details. So, lower sharpness slightly below defaults. Try to avoid vivid or high detail presets.
2.Reduce ISO when possible
ISO controls how sensitive the camera sensor becomes to light. In dark environments, the cameras automatically increase ISO because less light is reaching the sensor. However, this doesn’t only brighten the object but also the sensor noise, water haze, floating particles, and backscatter reflections. This can make the footage look grainy, muddy, and foggy. So, try to keep ISO as low as conditions allow. Add external lighting before raising ISO aggressively.
3.Lock Focus Manually
The autofocus feature in cameras depends heavily on contrast detection. In clean environments, the camera identifies sharp edges and focuses quickly. This is done in most underwater cameras as well. But if the water is murky, the camera will find it hard to decide what to focus on. This will result in constant focus shifts. Now, it can get worse if the particles are drifting across the frame and the lighting changes rapidly. So, try to use manual focus if possible. You can also pre-focus at the approximate working distance.
4.Increase frame rates carefully
Increasing frame rates helps reduce motion blur, fast fish movement, camera shake blur, and sediment streaking. For example, 60 FPS appears cleaner during movement than 24 FPS. But there is a hidden tradeoff. Without enough light, the camera compensates by raising ISO, increasing noise, and brightening haze. The best approach is to use higher frame rates when the water is moderately clear and external lighting is available. But keep frame rates lower when the water is extremely dark or visibility is already poor.
Conclusion
Murky water can be a real headache when you don’t know how to tackle it and get the right footage or just observe underwater. If there is almost no visibility, the cameras and human eyes can fail to see anything and we can hardly do anything about it. We may have to switch to different mediums like IR lighting. However, with some techniques, and little favorable conditions, we can easily improve the visuals way better than what we can think. We hope this article has provided you enough information about it.